Showing posts with label Gaslight rules. Show all posts

Sunday, August 9, 2015

Volcanic crater - tutorial


Thanks for all the kind comments on the making of my shell craters. I've now adapted the design to produce two volcanic caldera suitable for Pulp/SF/VSF gaming.

Follow the first steps given in the previous post to produce the basic crater. This time place the craters on a level surface, mix a small batch of watery plaster and pour it into the depression. It should form a smooth surface as shown below.
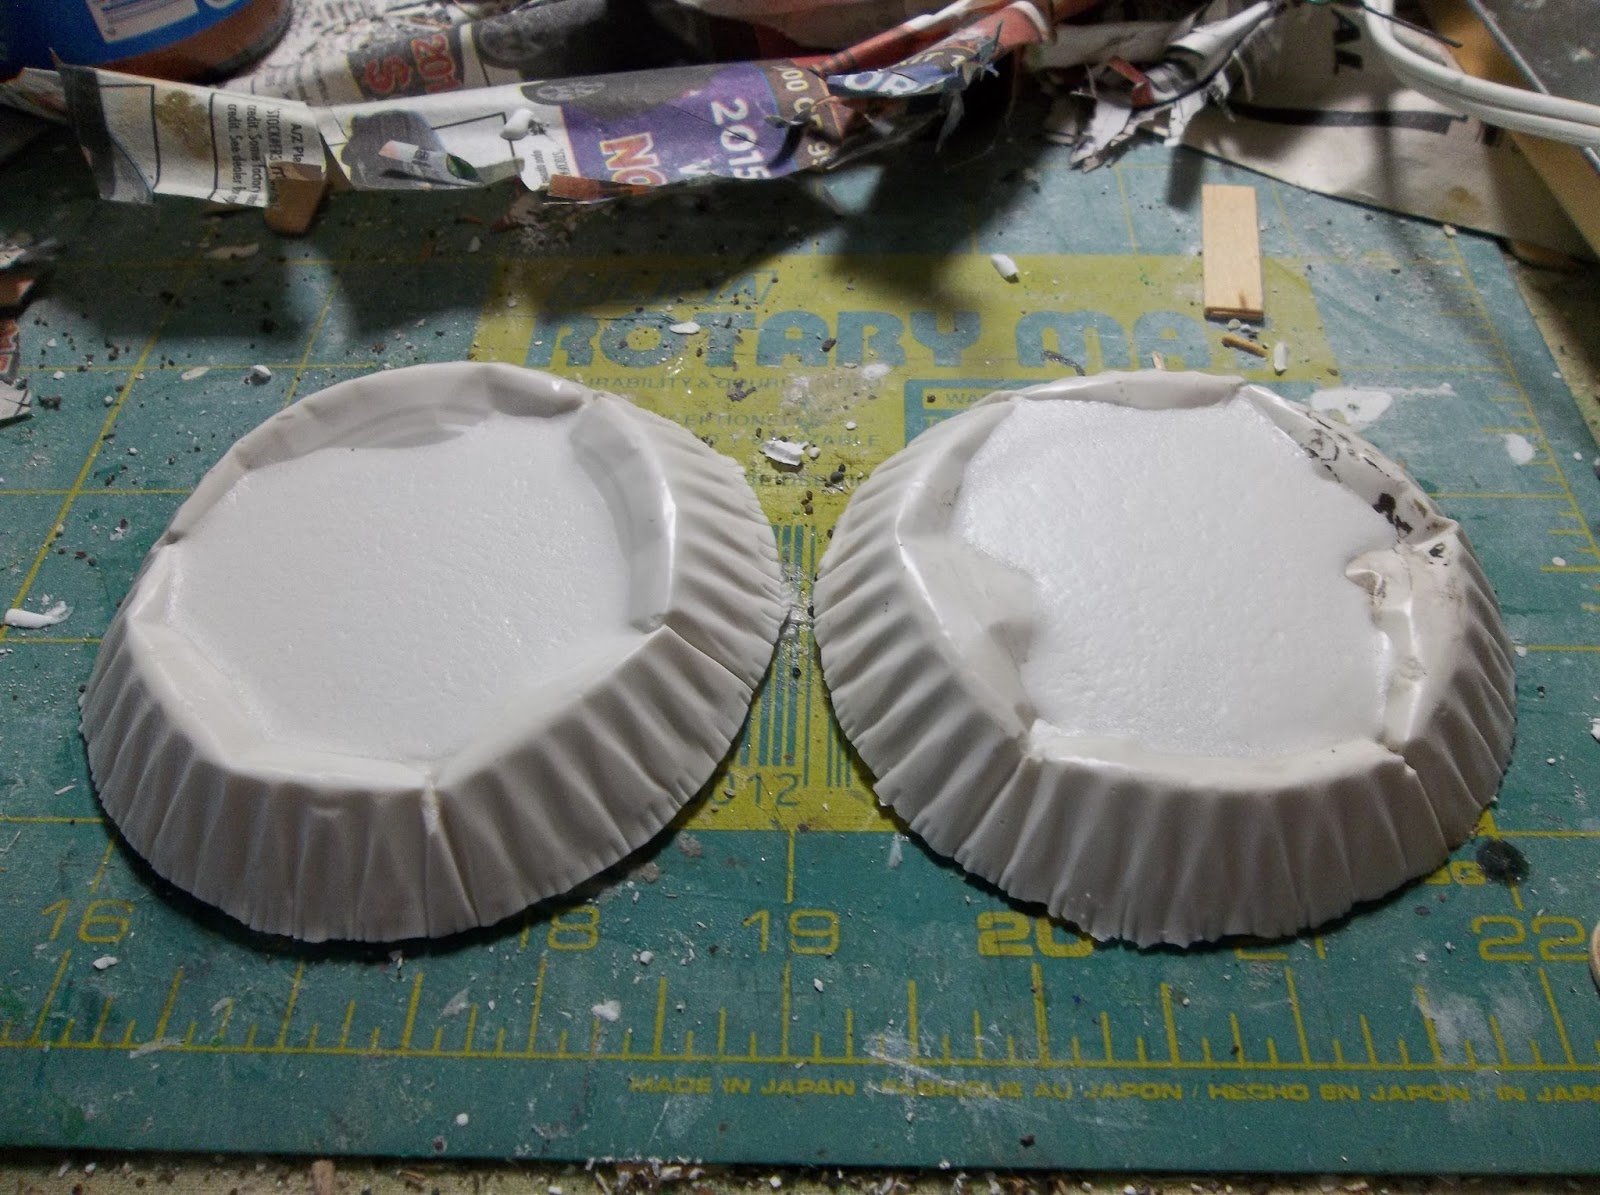
Next, add blobs of hot glue to the surface, giving the glue-gun trigger a half-pull to get smaller droplets. You'll find the glue doesn't stick to the plaster and comes away. This is perfectly fine. Remove any strands of glue from the droplets and replace them on the surface in a random pattern.


Next, mix yellow acrylic ink and watered-down PVA adhesive and pour slowly and carefully into the crater. The pour shouldn't disturb the glue blobs if you're careful. Don't worry if the ink mix runs over the side. Any spills will be covered later. You'll need to repeat this step once.

Glue discs of card to the bottom of the caldera, leaving a rim of about a quarter-inch wide. Wait until the glue has dried then mix yellow and red ink with Pledge floor polish to make a suitably fiery orange shade and pour onto the yellow glue surface. Add a few drops of water and work it around with a brush to get an even spread. You'll find the polish and water will dry to leave a crackle effect, revealing more of the yellow beneath the orange and the glue blob "bubbles" giving the effect of hotter lava welling up from below the cooling orange crust.


Once this is dry, add ground effect around the caldera by smearing 'Liquid Nails' construction adhesive onto the card surface and pressing dry coffee grounds into it. This'll create rough terrain that looks like it's cinder-covered. At this stage I also made the sides of the crater more uneven by applying smears of spackle.


Two intrepid explorers get uncomfortably close to the lava wells.
Once all that is dry, paint using ordinary craft paints to get the desired color scheme. I chose a dark gray, and added streaks of dull yellow and brown to represent sulfur out-gassing.


Thursday, July 23, 2015

Walker, completed


The last coat of ink and varnish and - 'tis done!


Miss Calida Van Wert and Dr. Emil Koots inspect the walker at close range.

Now I have my worktable clear for the first time in months, I rather fancy the idea of a Darkest Africa game. Perhaps it'll be a strike against the Barsetshire way-station on Tylers Knoll, an attack on a slaver encampment, or even the progress of the Barsetshires to the great lake, said to be somewhere to the north. Decisions, decisions...

Tuesday, September 4, 2012

Can you tell what it is yet?

A small GASLIGHT project I've had on the slipway for quite a few months has finally begun to take proper shape. In the immortal words of Rolf Harris, "Can you tell what it is yet?"


Wednesday, March 7, 2012

A few thoughts on GASLIGHT rules.

One game doesn't really give enough data for a major appraisal of a rules set. However, some points of the GASLIGHT rules can be addressed.

First, I like how quickly they play. With only three units per side it's probably not surprising, but the resolution of each unit's action took a mere matter of moments to deal with. The rules are card-driven, and I used an ordinary deck of playing cards, with a different denomination of card for each unit. 20-sided die are used for combat, vehicle handling and morale.

The GASLIGHT forum saw some recent discussion about utilizing an end-of-turn card, in the same style as the Sharp Practice 'Tiffin.' For the sake of friction of war I decided to use such a card for this game, and think it worked well. Both sides had turns which saw them steal a move over the opposition before the turn ended.

It did lead to frustration in the native camp when the golems failed to activate before the warband accompanying them. This caused a roadblock, which I deemed made the leader of the warband impatient. It set him off to tackle the Pond-friendly natives near the huts rather than concentrate on his mission, to the detriment of the golems.

GASLIGHT movement rates are set distances rather than random, as in Sharp Practice. Vehicles have their stats rolled at random before the start of the game. In the case of the S-G Mk II Steam Exploration Vehicle used by Willoughby Pond, it rolled rather well.

The golems aren't really covered by the rules, so I counted them in the same manner as vehicles, with some house rules added. I ruled a hit from an artillery piece or fusillade of bullets required each to roll a Sustain die. Failure meant the golem stopped moving. The witchdoctor controlling the things could make just one attempt on her next turn to restart a stopped golem on a successful Start die, but in this game she failed every time. 

As Dr. Vesuvius commented on the previous post, GASLIGHT tends to be one-sided when natives face off against Colonial Powers equipped with VSF trappings. There were instances in the recent game where the natives could have given the Pond Expedition a severe drubbing.  The S-G Mk II can be a clumsy beast when presented with more than one target, and those spaced well apart. Had the witchdoctor recovered control of the golems, or had the warband accompanied them instead of haring off on their own scheme, things might have turned out differently.

On reflection, should I play the scenario again, I'd add another golem or two to the native force, or increase the Start and Sustain attributes of the existing three. I could also ensure the native warband leader minds his duty so he accompanies the golems into contact with the enemy. 

I've yet to play the rules in an armor-vs-armor encounter. Other gamers (Hello again, Dr. V!) report rather odd results which are hard to explain away in game terms. I've a few ideas for another steam vehicle, which I hope to build in the fullness of time. 

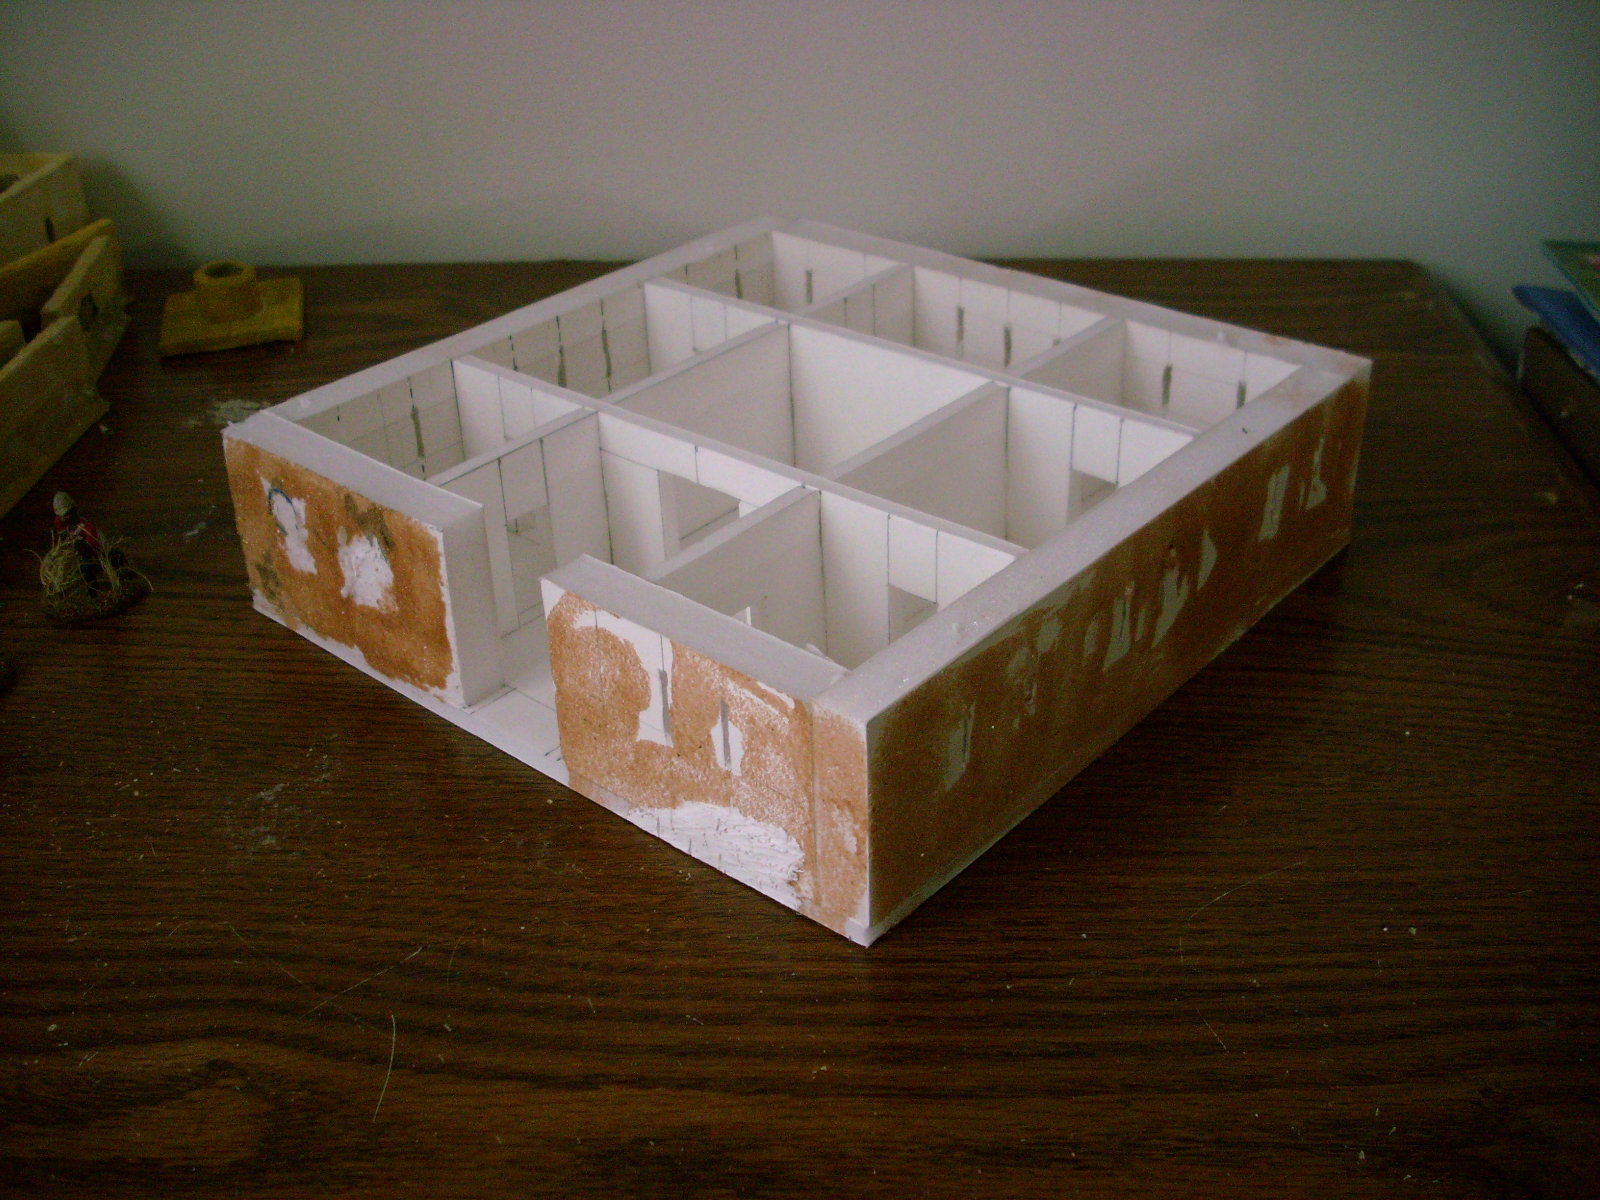
So, on the whole I like the rules. They seem to have some idiosyncrasies, but I need to play them through a few times to get a better feel for them. As for the next game, it'll probably be the beginning of the Sharp Practice mini-campaign, as mentioned previously. At the moment I'm busy working on a commission for some Very British Civil War structures, the first of which can be seen here.

 Boer War veteran Brigadier-General Sir Robert fFyfe-Robinson, KCB, inspects a blockhouse defending the boundaries of his village against all comers. The stovepipe shows provision has been made for that most British of institutions - a nice cuppa!

I've kind of watched AVBCW from the sidelines, unsure whether the genre appealed to me or not. It's not that I don't already have enough on my plate to deal with before starting a new period, oh no. But it does look awfully tempting...
 

Monday, March 5, 2012

Willoughby Pond's Expedition

Willoughby Pond did not give up his plans after an earlier attempt to establish a trading post in Ukraziland ended in abject failure when he was captured by the Ukrazi tribe. With Britain in firm control of the slaver port of Yabhouti, he has landed with a few companions and a steam exploration vehicle of the latest design, determined to succeed this time.

An offer by the chief of the Kumyonda tribe to lease him a plot of land has Pond champing at the bit. Hiring Sunny N'Sher and his merry band of mercenary musketeers, he has set off for the Kumyonda stretch of the Ukrazi River. We find him now, not long after noon, approaching the rendezvous with the Kumyonda chief. Unfortunately, the Kumyonda's hated rivals the Ukrazi tribe have learned of Pond's return to 'their' turf, and have set out to teach him a final, fatal, lesson...
The field of battle lies before the bold merchant adventurer. The Ukrazi River flows in the distance. On its bank the two huts of the rendezvous with the Kumyonda chief.

But the Witch Doctor of the Ukrazi tribe springs a nasty ambush! Three wooden golems, the animated trunks and branches of trees, emerge from the bush.  

Although horribly startled by the apparition, Pond quickly recovers, and lay fire upon the golems with telling effect. One takes a 3" shell in the midriff and lurches out of the line. On the other side of the clearing, the Ukrazi warband makes its rush, one of its number falling to a mercenary bullet.  

Closer to the river, a second Ukrazi warband forsakes its duty of escorting the golems for the easy (?) target of the Kumyonda warband. Filtering through the bush, they make enough noise to warn the Kumyonda chief of their coming.

Pond manages to swivel the Exploration vehicle to cover the oncoming golems. He fires and scores another hit, and stops one dead.
An attempt to swivel again and fire upon the onrushing warband fails. Wary of the hissing iron monster, the warband gets to grips with the mercenaries instead, just as a fusillade of musketry stops the last golem in its tracks.
What happens next will probably dog Pond's reputation for the rest of his days. Unnerved by the close proximity of the hostile tribesmen, Pond turns the vehicle and runs right through the middle of them, crushing six warriors beneath his treads...  
He goes on to run down and crush the second immobilized golem, before turning around for another pass.
Over by the hut, the Kumyonda warriors see the Ukrazi warband off the premises. 
Having failed to restart the golems, the Witchdoctor has made herself scarce.  Slipping away into the brush, she'll have some pointed words to say to the negligent leader of her escort.

And the end of the encounter. With their numbers literally crushed, Pond's vehicle gun menacing them, sporadic fire from the victorious mercenaries, and the Kumyonda warband hurrying over to join the fight, the Ukrazi survivors make themselves scarce.
So ends my first GASLIGHT game. I'll write a few thoughts on the rules and the playing of the game another time.

Saturday, March 3, 2012

GASLIGHT game AAR coming soon

An opportunity to game the long-planned Willoughby Pond scenario to GASLIGHT rules came up this afternoon, so I seized it with both hands. The game took less than two hours to fight solo, and could've gone either way. A report with photos will follow soon.

Sunday, February 26, 2012

GASLIGHT gear

Now my camera has fresh batteries to eat, I've finally managed to take some photos of the new models for my upcoming GASLIGHT game.

Below we have the Spottiswode-Gallant Steam Exploration Vehicle Mk. II, the big brother of the smaller, earlier version. With tracks instead of wheels, it can travel over more difficult terrain, although at a slower speed. Instead of a MG, the Mk. II carries a short-barreled 3-inch gun. The weapon's limited traverse and elevation are more than compensated for by the ability to fire canister rounds. Light armor provides protection from most small arms fire.   

Merchants on a mission. Willoughby Pond & companions seek out new markets to conquer.

A generous space is provided on the rear deck for all kinds of equipment and merchandise. The boiler is operated by just one stoker using a semi-automatic fuel feeder system.

Below we have an enemy's eye view of an African witchdoctor's response to intruders. Magically animated from fallen trees and logs, these golems are twice the height of a man, preternaturally strong, and extremely difficult to destroy. Even fire takes a while to affect them. The sight of them stumping over a hill, monstrous arms swinging with intent, is enough to quell the ardor of any warrior - or Soldier of the Queen!  

Something Weird this way comes. African golems in action.

The exploration vehicle is mostly built of card on a foamcore hull, with Hirst Arts pipework and crates, painted with acrylics and finished with a coat of Future/Klear. The golems are short lengths of thick twigs, split and glued to form arms and legs, and darkened with a coat of India Ink thinned with surgical spirit. Other details painted on, although the marking came out more native American than African. Oh well...

Hopefully, these will be in action next weekend.

Wednesday, February 1, 2012

GASLIGHT scenario development

A stinking cold isn't exactly helping me at the moment. With inflamed sinuses and my right eye streaming like Niagara Falls, it's a task and a half trying to do anything. Still, I've managed to make a start on preparing the upcoming GASLIGHT scenario.

I've had these rules for some time, but this is the first occasion I've decided to play them. They do require a modicum of pre-game preparation, in the shape of character development. A good and useful tutorial can be found at Dr. Vesuvius' Axis of Naughtiness blog. 

GASLIGHT allows for the creation of Main Characters (MCs). These have four basic types, in ascending order of potency:- Veteran, Leader, Adventurer, Hero. By rolling a d20 and consulting the chart, the player assigns numbers to the attributes of Shoot, Scuffle, and Save. The higher the number the better, as these will be rolled against in the course of the game, and various modifiers come into play according to circumstances. 

MCs also get Skills, again rolled randomly. Heroes, being the most accomplished, get two; every other MC type gets one. Most of these skills are advantageous in some way - skill at shooting, using melee weapons, observation, etc. A few are detrimental, such as Drunk, Yellow, Clumsy, and so on. MCs can lead units, or be unattached. Only MCs have the Save attribute, allowing a figure to roll to avoid potentially damaging or deadly results from an encounter. All other figures are treated as Extras, having just Shoot and Scuffle attributes. When hit - they die.

In my case, I rolled the following attributes for Willoughby Pond, Merchant Adventurer. Shoot: 12  Scuffle: 15  Save: 14  Skill: Tough. The rascal has an average shooting ability, but he's quite tasty in hand-to-hand combat. Useful with his fists, no doubt. In game terms his Tough characteristic means he won't die the first time he fails a Save roll, and he ignores the effects of disease - useful if trekking through the African bush. 

He'll have a coterie of troops with him in the shape of Sunny N'Sher's mercenary tribal warriors. Sunny himself is rated as a Leader, with the following attributes:- Shoot: 13  Scuffle: 13  Save: 11  Skill: Natural Leader. He will lead his men, all with Shoot 8 and Scuffle 9, and, because of his charisma, all prepared to go to the wire for him.

The Kumyonda tribe has expressed an interest in providing Pond with a site for his trading post. All he has to do is reach the area and build it. The Kumyonda chief has assigned a couple of warbands to patrol the area against the rival Ukrazi tribe's interference and to escort Pond's expedition to safety if necessary. Unfortunately, the chief selected the local equivalent of Harry Flashman to lead them... 

Kumalonga is a strapping fellow, with Shoot 14, Scuffle 12, a Save 15. Unfortunately his Skill rolled up as Yellow. To quote the phrase used in the GASLIGHT rulebook, "he wouldn't walk up to an angry baby with a rattle."   

Pond has a history of bad blood with the local Ukrazi tribe. They have gotten word of his plans to establish a trading post in the territory of their bitter rivals, the Kumyonda tribe, and are prepared to voice their displeasure. Ukrazi tribal warbands have set out to catch and punish Pond and all who help him. Their attributes are Shoot: 6, Scuffle: 10. 

I'm planning to make a vehicle for Pond's expedition in the shape of a Spottiswoode-Gallant Steam vehicle of some kind. Perhaps one of these...


Vehicles have their own capabilities under the GASLIGHT rules. These are rolled on a chart, or can be selected by the umpire to fit game requirements. The capabilities are Save (the vehicle's armor protection), Speed (whether Sailing, Steaming, or Swimming), Start (to get the blessed thing rolling in the first place) Sustain (to keep the thing moving), and Spin (its maneuverability - or otherwise).

The little vehicle above has the following capabilities, all randomly rolled. Save: 14, Steam: 10, Start: 14, Sustain: 19, Spin: 45 degrees. On the whole, it's a fast, reliable vehicle, but about as maneuverable as the average barn. 

The Ukrazi tribe lack any steamy conveyances of their own, but that's not to say they're without resources. I have a few ideas for an equalizing unit, but will say no more for now.      
 

Friday, January 27, 2012

New characters & a tembe

We've had a quiet couple of weeks, looking after my mother-in-law during her illness. My model-making, gaming and figure painting has had to take a spell on the back burner, but I found time to finish the figures I bought on eBob a while ago. 

I also completed a tembe for sale on eBob right now. I'll make another one for the upcoming game once I get my gaming room/studio back.  Here are a couple of photos showing the external and internal appearance.

 Colonel Trollope watches Private Lewis in action. 

 Zanzibar warriors garrison the tembe against upset natives.

Both doors to the courtyard open. I omitted the interior doors, as this is a gaming model.

And now, a few pics of the newcomers to Daftest Africa.


They're all Wargames Foundry. I've seen most of these in more than one collection over the years. My favorites are the red-bearded sea captain in his pea-jacket, holding a pistol behind his back, and the gentleman with the walking cane standing next to him. A few names for these folks are suggesting themselves to me already...

I did write earlier that I planned to use the linked scenario idea, as published in one of the hobby magazines. This I'll do, but a prequel suggests itself in the form of Willoughby Pond's latest scheme. For this scenario, I'll give the GASLIGHT rules a try. I hope to play it out in the next couple of weeks.
 

Friday, October 21, 2011

Libyan Landship

These photos have appeared online in several places lately, but I thought I'd share them here. It shows what ingenuity goes into improvising for warfare, and hats off to the Libyan rebels who came up with this cracker.


It appears to be composed of an armored carapace built onto a commercial bulldozer chassis. Firing ports complete with armored shutters dot the front and sides. How effective it could be is beyond my ken, but it looks pretty fierce.

It puts me in mind of some of the improvised designs used in the Spanish Civil War - and even Corporal Jones' butcher's van/battlewagon in the classic British TV series, Dad's Army

The breadth of applications for this vehicle on a wargames table are pretty good. It could appear in a Very British Civil War campaign in the line-up for one faction or another. For myself, I can see a certain use for it in Daftest Africa. Is that a hint? Could be!   

Thursday, April 7, 2011

Arab tower

Some months ago my wife pointed out a useful item in our local Michaels hobby store in the shape of a wooden birdhouse. I bought it immediately, seeing the potential for a little augmentation. The basic form of it is shown below. 


Before...

I added the door and arch, all plaster moldings from a Hirst Arts mold, then covered the wood with a layer of diluted PVA and sand to provide a keyed surface. While this dried I added a flagpole receptacle cut from a short length of plastic coffee stirrer glued into place in a front corner.

The whole was covered with a layer of spackle, making sure to cover the flagpole holder. When the spackle was semi-dry I made firing slits in places where the wood had been cut to represent stonework. Once all had dried I painted the model with Craft Smart acrylics, picking out the firing slits in black. I gave the whole tower an ink wash using 8 drops of sepia ink and one of India ink to about two fluid ounces of water to age the appearance and bring out the texture. A dry brush of antique white then plain white followed. A flag based loosely on a Mahdist version completed the model. This can be substituted for any other flag as the tower changes hands.

After. Sub Chief N'kwana helps demonstrate the size.


Wednesday, March 9, 2011

Animal encounters - Hippo

Er... I say, chaps?
*
Three stalwart fellows of the British Army Medical Corps set out in a steam launch to deliver much-needed medicines to an outpost upriver. They have absolutely no experience in matters mechanical, but as Barrington said on surveying the vessel tied up at the jetty "How hard can handling one of these things be? After all, it's not exactly brain surgery, what?" When the launch broke down halfway to their destination he acknowledged his words had returned to haunt him.

And so we picture the scene. As the crestfallen but determined Barrington puzzles over the complexities of the steam engine, Nugent-King fiddles with the boat anchor in the bows. All seems calm on the river this morning - but appearances can be deceptive, for Petherbridge has espied a bloat of hippos taking a keen interest in the proceedings.
*
The waterlined hippos proved easy to make. Simply take a suitable hippo model (in this case a plastic one from a 'toob'), press the head into a flattened lump of air-dry clay until a suitable waterline is reached (just about level with that enormous mouth), remove, and fill the void with plaster (in this case Hydrostone engineering plaster). Allow to set hard, pop the casting out of the clay, paint and varnish. Some sanding may be required to ensure the casting is level.

Tuesday, March 8, 2011

Willoughby Pond's Trading Post

Bearers carry goods to the go-down as Willoughby Pond discusses trade matters with District Commissioner Carstairs. The ladies admire the bougainvillea alongside the stoop - a home-like touch in the Heart of Africa.

Another feature for Daftest Africa - Willoughby Pond's Trading Emporium. This establishment consists of a single-storey main building, a go-down (warehouse), in the pattern of those found along the River Congo, all surrounded by a palisade for security against animals and theft.

The palisade is made of twigs cut to size and glued to wooden battens using a hot glue gun. Spackle is used to build up and weight the base, before flocking is applied and fixed in place with PVA. The whole is secured with a spritz of diluted PVA mixed with suitable shades of acylic paint.

The main building is made of foamcore with a spackle rendering, with embroidery battening used for the trellis work along the stoop and behind the bougainvillea. Shutters are simple card, painted with acrylics and the slats drawn on with a black marker pen. Its corrugated iron roof was cut from a pizza box and one of the paper sheets carefully stripped off. This is a fiddly job but the results are worth it. The whole is painted with acrylics before given a wash of India and sepia ink. Barely visible to the right on the roof is the stovepipe, made from a short length of plastic coffee stirrer.

A useful little structure, it can also serve as a schoolhouse, mission, hospital or residence.

Thursday, February 24, 2011

Hewers of wood, fetchers of water...

I decided my Daftest Africa campaign world would benefit from the presence of a few working stiffs - those guys and gals who do the countless tasks that make up everyday life. The figures shown below were bought on eBay and come from a variety of sources. The little donkey is a venerable survivor on the lead mountain, being thirty-some years old and finally, finally painted and based! It's been so long since I bought her I can't remember which manufacturer she came from, although a vague memory suggests Hinchcliffe.

Master 'Gyppo' (British army slang for Chief Cook) O'Brien samples his wares as civilian scout Kansas Pete Carter (who's a lo-o-ong way from home...) tends the fire. Around them the hewers of wood and fetchers of water do their thing.

Civilian contractor Willoughby Pond looks on as his train of bearers demonstrate the vitality of commerce in Daftest Africa. The termite mounds are fashioned from air-dry modelling clay and spackle.

*
Some more thoughts on Sharp Practise - Colonial style. I previously listed some bonus card ideas. Today I'm going to explain my idea for a Wildlife blind. The firing event chart in Sharp Practise lists an "escaped livestock" incident, but in Africa the local wildlife is inclined to do more than simply stampede.

A Wildlife blind could represent a few scouts, skirmishers, etc as normal - or it could mean there's a group of tawny bewhiskered faces peering out from the midst of that elephant grass.

Encounters will have to vary depending on the terrain. Those on the savanna can range from frightened antelope who want nothing more than to escape being somebody's lunch, to lions who want to set their own menu! Gorillas lurk in the jungle, ready to turn decidedly medieval on trespassers. Fire ants are notoriously nasty beasts: They and African bees can be deadly, and can't be shot. One battle in WW1 saw the hasty retreat of a British force from a swarm of bees, much to the relief of their German opponents! The great rivers are home to crocodile and hippopotamus. Not only does the hippo kill more people per year than the crocodile, its breath is supposedly the most awful in the world.

So, I'm thinking in terms of including an animal blind with the other normal versions. If a player's force ventures close enough to trip the blind's activation a die is thrown. A score of 1-4, say, will mean the disturbed animal is harmless and will flee. A 5-6 requires a roll on an encounter chart, with the beast(s) encountered being determined according to the prevailing terrain. I'll work something up and post it here soon.

Tuesday, February 15, 2011

Reedy river

Some time ago I wrote about a method of creating savanna grass using dried pine needles. A recent find of fresh pine needles on a fallen branch got me thinking of other ways to use nature's bounty. One thing that came to mind is the presence of so many rivers in Colonial-era gaming - and the reed beds found along all of them at one point or another. So it was I came up with the idea of recreating the effect of reeds along a river bank.

I made use of 1" - 2" strips of clear plastic cut from packaging material, as this is both transparent and stiff enough to resist any warping. Cutting or twisting off varying lengths of the fresh pine needles gave me nice thin reed-like stems, and I glued these in clumps to the plastic using a low-heat hot glue gun. A little care makes sure the glue goes on the plastic while avoiding touching the plastic with the hot tip of the gun. Take enough pine needles to hold comfortably in your fingers and simply stick the cut ends into the molten glue, holding them in place as it sets. A little teasing of the stems makes them appear more like natural growth. Fresh pine needles contain enough resin that they'll remain quite supple.

Once everything is set, they're ready for use. I made about a dozen or so, and set up the scene below using a sheet of clear plastic on top of blue poster card. As you can see the transparent strips virtually vanish against the surface they stand on, with the blobs of glue resembling the motion of water around the stems as the river flows. Place even a few strips side by side and they create a nice line-of-sight block or hiding place.

A native woman makes her way down to the riverbank to fetch water in the early morning light. The river flows by, smooth and tranquil.


Wednesday, February 9, 2011

Tembe - finished

On to the final stages of tembe construction. After applying the thatch I laid a heavy book on the roof and left it overnight as it showed signs of warping. The weight solved this problem. Next up came the spackling of the walls. I applied regular all-purpose spackling in a thin layer over the sand sprinkled on earlier, working around those areas I'd already done as brickwork, and allowed it to dry. In the meantime I painted the main roof color using a mix of tan, white and yellow acrylics. Once this was dry I went over it with drybrushed vanilla white acrylic.

Once the walls were dry I painted them a slightly darker shade of tan than the roof, with dark brown going on those areas of exposed brickwork. To bring out the texture of the spackle so it resembles stucco I gave the whole wall areas two increasingly lighter drybrushed colors, a mix of the basic tan and vanilla white, followed by pure vanilla white. Once everything had dried I gave the whole building a wash of sepia ink diluted with rubbing alcohol, a trick I picked up from railroad modelling. The alcohol spreads the ink evenly and evaporates quickly, leaving a nice weathered effect without mess. The photo shows the final result, although the tembe looks somewhat darker in real life due to the lighting conditions when the photo was taken.

I think it looks the part, ready to take its place on the table for use by anybody who has need of a fortified building in my fictional African world. And you can be sure there'll be many!

A British patrol approaches the tembe with caution, unsure who - or what - lurks within.


Tuesday, February 8, 2011

Tembe 3

The next and final major construction for this model is the roof. As mentioned earlier I decided to make it a pitched roof, and to do this I glued vertical 1/2 inch strips of foamcore waste onto the platform I made earlier, running each strip down the center of the platform. Once these were set I cut thin card to rough shapes that fit the pitch and corners and glued these onto the platform, as shown below.

I covered the whole with paper, gluing this into place with diluted PVA then added a layer of spackle and PVA mixed with chopped up paper to give a rough thatch effect. Once this dried I painted it with Craft Smart acrylics to give a base coat, to which I'll add highlights and shading.

The next step will be to spackle the walls. As seen by the white patches in the first photo I've already spread a thin layer of spackle on parts of the walls and scoured them with a brick effect to resemble areas where the stucco has fallen - or been shot away - over the years. More soon.

Monday, February 7, 2011

Tembe 2

A little more progress with the tembe. I pierced the outer walls for the firing slits then glued them in place, holding them so using pins. Once everything was secure I gave the outer walls a coat of thinned PVA and sprinkled sand on them to provide a keyed surface for the spackle layer.


Private Fred Dibble demonstrates the scale.


I got to work on the first stage of the roof while the sand coat dried. A sheet of thin card forms the base, with kebob skewers glued to it to provide cross-bracing. I opted for this method since card is notoriously prone to warping, foamcore would've been too thick, and MDF too heavy. Ordinary white adhesive will fix the skewers firmly but they do need to be weighed down to ensure this.
The typical tembe had a thatched roof (and I don't need to point out the problems that would cause in a fortified building) and they appear to have been flat. I've decided to give it a slight peak, enabling it to shed rainwater more effectively and giving at least a chance for any burning objects thrown up onto it to roll off. That will come in the next stage.

Friday, January 21, 2011

On Afric's burning shore

I now have a few buildings ready for my Africa Station campaign. It only remains for me to make some walls and a gate or two, then I can assemble the necessary warlike inhabitants.

Sunrise somewhere in east Africa. The villagers rise early and begin their daily tasks as the river slips quietly by. No vessels are moored at the jetty, but who knows what the day will bring?

Fatima, Mahmoud the merchant's wife looks down on the tiny village square as her neighbours go about their business. A bearer has already collected a bundle of goods from her husband's go-down by the river and is heading for the house. Crime must be almost non-existent here judging by the goods left by the door. The tiny mosque is open but no one seems to be home. Perhaps the mullah has been called away - is there trouble brewing?

*

(I have another village like this for sale at my Etsy store. Click here for details!)

Thursday, January 6, 2011

Raising standards

Here are another couple of additions to my Africa Station collection, again from the figures I bought on eBay.

Certain rules have provision for standard bearers to act in the historical roles of rallying points and morale-raisers for their units. The eBay figures had these two fellows in the batch.

The one shown below (which I think is Foundry) had hands poised as if holding a spear or staff, but the hands were solid. I drilled these out and inserted a length of stiff wire to make a flagstaff. The device on the flag is a piece of free clip art found online.

Since this guy is going to be the standard bearer for Sunny N'Sher's mercenary band, I decided to give him a flag that has European influences while still echoing African traditions. I chose the emblem of a bull's head since cattle were - and are - a valuable resource in Africa.

The clip art had to be re-sized to fit the scale, but this was easy enough to do with the basic PC Paint program. I then printed it off and trimmed the paper to size. A wash of Pledge/Future/Klear mixed with a drop of sepia ink gave it a weathered appearance. The polish is a good medium to use on any materials printed from a computer since it doesn't cause the ink to run or smear. A small rectangle of tinfoil was inserted between the sides before they were glued together to stiffen the flag so it can be curled in a realistic way.

*

In certain African tribes it was traditional for chiefs to direct combat from well behind the lines. Not for them the undignified rough and tumble of warfare! Some chiefs used umbrellas or parasols as personal standards, and the eBay batch had a figure which I could use for this.

It turned out to have some problems though. Although touted as suitable for Darkest Africa, it appeared to be more a candidate for an ancient society. He has rather chunky legs, which led me to suspect the sculptor may have intended the guy to wear greaves. If so, they were badly rendered, and so was the staff for the parasol he clutched in his right hand. It looked more like a rough-cut plank! Another hint as to his ancient origins lies in the satchel of scrolls he wears over his shoulder.

The parasol staff went right away, the hand being drilled out to take a length of wire. There wasn't a great deal I could do for his legs beyond a little filing, so in the end I left them. The parasol itself turned out rather well, being painted in a fetching shade of pink. The new standard bearer is shown in action above, shading his boss while showing his location for all to see. He holds a satchel of scrolls so the boss can indulge in a little light reading between his onerous duties.
 

home page uniques