Showing posts with label American Civil War. Show all posts
Showing posts with label American Civil War. Show all posts
Tuesday, May 22, 2018
Monitor Oddity
Way back in the day I scratch-built a model of an American Civil War oddity - USS Ozark. A hybrid between the turreted Monitor-class ironclad and a conventional Mississippi steamboat, this odd duck was commissioned in 1864 and served in campaigns and actions along the Mississippi and Red Rivers.
Rather under-powered, Ozark often had to be taken in tow by other vessels when the river currents were stronger than her own engines could cope with. Even so, she packed a heck of a wallop. Her turret mounted two 11-inch Dahlgren guns, with a 10-inch Dahlgren aft chaser and three 9-inch Dahlgrens covering her beams. The turret itself sported six inches of armour plating, and more armour covered the first forty feet of her hull and the deck.
Ozark was sold after the end of the war, but she was still in service and based in New Orleans as late as 1874 when she took part in a police action against white supremacists. Her subsequent fate isn't known - which is where my alternate history idea comes in...
A European power wishing to expand operations in the Hidden Continent (my version of Darkest Africa) purchased the Ozark and refitted her for operations on the mighty rivers and lakes of that world. Such a 'ship of force' would be something to contend with, and would make even the mighty Royal Navy squint thoughtfully.
My original model is back in the UK, along with a lot of other gaming stuff I hope to retrieve some day. In the meantime I have the materials at hand to build a new version. When I have a bit of time I'll break out the hot glue gun and commence building it. Photos to follow when I do.
Friday, August 5, 2016
Gettysburg (III)
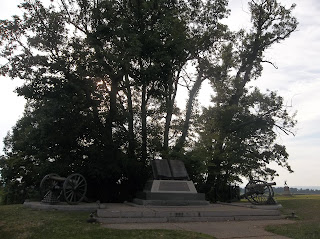
Here are the final photos of the Gettysburg battlefield. These cover the Wheatfield, Peach Orchard, Plum Run, Pickett's Charge and the High Water Mark.
On the second day, General Longstreet sent his 1st Corps against the Union left across this field and the nearby Peach Orchard. Fierce fighting raged all day. The Union III Corps was effectively destroyed trying to defend too big an area, but they prevented the Confederates from reaching the heights to the east.
 |
| The Peach Orchard, with the modern descendants of those trees gracing the place today. |
 |
| Looking east toward the main Union positions. |
 |
| Memorial to the famous NY Fire Zouaves. |
 |
| Plum Run Creek. |
 |
| Father William Corby, chaplain to one of the NY regiments. |
 |
| The Pennsylvania Memorial. |
 |
| Looking south toward the Round Tops from the viewing platform atop the memorial. |
 |
| Looking west toward the Confederate lines. |
 |
| Looking north toward the Seminary. |
 |
| Spangler's Spring, at the southern end of Culp's Hill. |
 |
| The area around the Spring, with the Indiana memorial. |
Spangler's Spring turned into a cockpit during the fighting on the second day. It formed the extreme right of the Union line, the barbed end of the 'fishhook.' Although the Union retired at nightfall the Confederates had failed to gain an advantage.
The third day saw the famous charge of Picket's Divisions across the center of the battlefield toward Cemetery Ridge.
 |
| Looking from the Virginians' positions toward the Copse of Trees. |
 |
| Looking back at the Confederate lines. |
Longstreet wanted to lead the charge but Robert E. Lee forbade it. After a ferocious barrage from Confederate artillery 12,000 men set out from the cover of the trees above, marching across the undulating ground toward the waiting Union soldiers atop Cemetery Ridge.
 |
| Cemetery Ridge. |
 |
| The Angle, and the High Water Mark of the Confederacy. |
 |
| Memorials to the many Union gunners who defended the ridge. |
 |
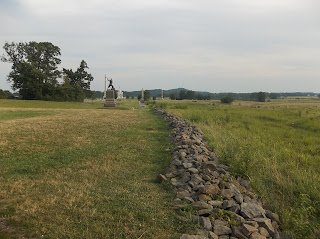
| The stone wall atop the ridge. Few rebels managed to cross it. |
Lee saw the undulating ground might serve to conceal Pickett's onrushing troops from Union fire for at least part of their march. He proved wrong, and admitted it when Pickett led his battered and bloody survivors back to their lines.
Lee rode out a little way to meet his men as they retired. "It has been all my fault," he was heard to say. The attack had cost his army 6,000 irreplaceable veterans.
 |
| The scene of Lee's meeting with Pickett. |
* * * *
That's all for my recent adventures on the Civil War battlefields. I'm making some progress on the steam gunboat model for Colonial gaming. More on that another time.Wednesday, August 3, 2016
Gettysburg (II)
Here is the second batch of photos my wife and I took at Gettysburg battlefield. These will cover the Union side of the battle, beginning with the Round Tops and ending at the High Water Mark. We took so many photos even a limited selection would be too much for any one blog posting, so the third and final post will be in a few days.
 |
| The human cost of battle |
 |
| Silent and peaceful now, but back then... |
This pleasant meadow lies to the west of Little Round Top. It was the site of a casualty clearing station for a while during the battle and later, when the fighting was done.
One of those tragedies which featured in the battle occurred near here, when Brig. Gen. Kilpatrick ordered his subordinate Brig. Gen. Farnsworth to charge through the woods with his cavalry to clear Confederate skirmishers. Farnsworth protested the order, pointing out the tangled nature of the terrain, but failed to have it rescinded. Kilpatrick was a cavalry general, and boasted cavalry could fight anywhere except at sea. Farnsworth charged with 300 of his troopers. He and many of his men died in this fruitless attack.
On now to the slopes of Little Round Top, and the famed 20th Maine led by their commander the redoubtable Col. Lawrence Chamberlain.
The lower, southern slopes of the hill formed the 20th Maine's post in battle. Here they fought against repeated attacks by an Alabama regiment which climbed the hill in an attempt to turn the Union flank.
 |
| Looking down the slope up which the Alabamans attacked. The plinth marks where the 20th Maine's right flank rested. |
 |
| The level ground atop the slope. My Better Half wears appropriate Union colors. |
 |
| The site of the 'swinging gate' flank attack by the 20th Maine which broke the final charge of the Alabamans. |
Little Round Top proved pivotal to the Union defence, a fact recognized by General Gouverneur Warren when he surveyed the area on the second day. To his horror the hill was undefended, and he urged Meade to send troops down to occupy it right away. They made it scant minutes before the first Confederates arrived.
 |
| The opening onto the top of Little Round Top, looking west toward the rebel lines. |
Longstreet marched his divisions out of sight of the Union watchers on the hill, keeping them behind the woods and hills shown in the distance above.
 |
| Looking North. |
 |
| Some of the cannon representing those dragged up here by the Union artillerymen. |
Union artillerymen managed to drag guns up to the height in spite of the slope and difficult terrain. They served to defend Little Round Top, but at a price in killed and wounded.
 |
| The Devil's Den, the tumble of rocks and outcrops that made a formidable obstacle for the Confederate attacks on this end of the line. |
 |
| The statue of Gouverneur K. Warren stands on the rock he himself surveyed the battlefield from. |
 |
| Another view of Devil's Den in the middle distance. |
That's all for now. I hope to post the remaining photos from the battlefield in due course. They'll feature the Wheatfield, Peach Orchard, the site of Pickett's Charge and the Angle.
Monday, August 1, 2016
Gettysburg (I)
Here are some of the photos I took of the Gettysburg battlefield last week. Due to the sheer size of the battlefield and the number of photos taken, I'm going to divide this post in two. This one covers the early clash on July 1, 1863, and the Confederate side of the battlefield. The Union side and Pickett's Charge will be in the next post in a few days' time.
 |
| Scene of the first clash - July 1, 1863 |
We followed the auto-route suggested by the guide in the battlefield museum. This is a straightforward course that follows the sequence of the battle in roughly chronological order.
First up was the scene of the clash between Union cavalry under General Buford against Confederate Generals Heth, Hill and Ewell. The countryside is rolling here. The higher ground to the north made an ideal site for Confederate artillery, which was brought into good effect against Buford and later Reynolds. Reynolds was killed by a sharpshooter's bullet and the Union troops forced back to Oak Ridge then Culp's Hill.
 |
| Looking North toward the Peace Monument. |
 |
| Looking from the Peace Monument south-east toward Oak Ridge. The Lutheran Seminary lies beyond the woods. |
 |
| 12 pounder Napoleon by the Peace Monument. I noticed this deep elongated dent in the bronze barrel by the touch-hole. Evidence of a shot striking it? |
Culp's Hill formed the northern end of the famous 'fishhook' shape of the battlefield. A railroad cut had been made in the area, although the track itself had not been laid. The cut proved to be a killing ground for the attacking Confederates. Unable to maneuver in its confines they were cut down in scores by the defending Union troops.
 |
| Looking south-west to the railroad cut. |
 |
| Sighting at the Railroad Cut along the barrel of a 10-pounder Parrot rifle near the Peace Monument. The Cut is well within range, and these guns supported Longstreet's attack on the 2nd day. |
 |
| Looking toward the Seminary from the observation tower atop Oak Ridge. |
 |
| The curious and rather charming memorial to the 90th Pennsylvania Volunteers, who formed the right of the 1st Corps atop Oak Ridge. |
 |
| A charming volunteer looks across the fields toward the Union lines atop Cemetery Ridge. |
 |
| The site of the Confederate gun lines. |
 |
| Farther south along the gun line - and the Copse of Trees, the High Water Mark of Pickett's Charge. |
 | |
| The Virginia Monument, with Robert E. Lee mounted on Traveler atop it, located roughly in the center of the Confederate positions. |
 | ||||
| "Old Pete," Lt. General Longstreet, cast in bronze. His HQ during the battle was sited a few hundred yards from this spot. |
 |
| Looking east at the Round Tops, Little to the left, Big to the right. |
Subscribe to:
Posts (Atom)


