Thursday, August 27, 2015
Getting back into the swing of things
Thanks to all who gave their best wishes. My leg is getting better. The doctor confirmed a diagnosis of 'superficial phlebitis,' a condition where a small blood clot forms in a surface vein. Thankfully it's treatable by resting said limb and applying a heat pad at intervals, although there's nothing 'superficial' about the pain when the little bugger first strikes. I should be fine in a month, tops.
In the meantime I've finished the Alms House for the next VBCW game, and made a start on a pond for my terrain collection. I would post a photo or two of the process but my camera has chosen to devour another set of batteries. First world problems...
Saturday, August 22, 2015
Ouch...
Not much happening gaming or modelling wise this week. An excruciating pain in my left leg meant a trip to hospital and orders to rest up for a few days. There were no blood clots moving around and doing bad things, thank goodness, and the leg is feeling better every day. I have a follow-up check with my GP on Monday. Hopefully she'll give me the all-clear.
In the meantime, I did manage to make a start on an N scale model alms house for my VBCW gaming. It'll feature in an up-coming game as part of the campaign between the Thetford Anglican League and the BUF of Bury St. Edmunds.
Sunday, August 9, 2015
Volcanic crater - tutorial
Thanks for all the kind comments on the making of my shell craters. I've now adapted the design to produce two volcanic caldera suitable for Pulp/SF/VSF gaming.
Follow the first steps given in the previous post to produce the basic crater. This time place the craters on a level surface, mix a small batch of watery plaster and pour it into the depression. It should form a smooth surface as shown below.

Next, mix yellow acrylic ink and watered-down PVA adhesive and pour slowly and carefully into the crater. The pour shouldn't disturb the glue blobs if you're careful. Don't worry if the ink mix runs over the side. Any spills will be covered later. You'll need to repeat this step once.

Glue discs of card to the bottom of the caldera, leaving a rim of about a quarter-inch wide. Wait until the glue has dried then mix yellow and red ink with Pledge floor polish to make a suitably fiery orange shade and pour onto the yellow glue surface. Add a few drops of water and work it around with a brush to get an even spread. You'll find the polish and water will dry to leave a crackle effect, revealing more of the yellow beneath the orange and the glue blob "bubbles" giving the effect of hotter lava welling up from below the cooling orange crust.

Once this is dry, add ground effect around the caldera by smearing 'Liquid Nails' construction adhesive onto the card surface and pressing dry coffee grounds into it. This'll create rough terrain that looks like it's cinder-covered. At this stage I also made the sides of the crater more uneven by applying smears of spackle.

 |
| Two intrepid explorers get uncomfortably close to the lava wells. |
Once all that is dry, paint using ordinary craft paints to get the desired color scheme. I chose a dark gray, and added streaks of dull yellow and brown to represent sulfur out-gassing.
Wednesday, August 5, 2015
The Crater Mess Experiment - 3
The final result...

...and two more craters finished as dry versions.

The next project will be a couple of craters suitable for Pulp and VSF/SF gaming. Watch this space...
Tuesday, August 4, 2015
The Crater Mess Experiment - 2
More progress on my pie-dish craters...

Lewis
gunner Jack Dillon recalled years later how ‘the mud there [at
Passchendaele] wasn’t liquid, it wasn’t porridge, it was a curious kind
of sucking kind of mud ... a real monster that sucked at you’. Rain and
artillery fire joined forces to turn the trenches into cesspools where
the men floundered and even drowned; or, killed by shell-fire, their
bodies dissolved into the slime - See more at:
http://www.bl.uk/world-war-one/articles/sensuous-life-in-the-trenches#sthash.beR9cXt4.dpuf
The one on the left shows the crater with splats and splodges of spackle and watered Aleene's glue, sprinkled with dried coffee grounds and sand. It breaks up the regular appearance of the plaster cast. The one on the right has been painted using ordinary craft acrylic paint. Descriptions of shell craters from the Great War speak of strange streaks of colour in the horrible mixture of mud and slime, presumably from the chemicals used in the explosive content of shells, so I added some areas of yellow and terracotta here and there.
Next I stirred green acrylic ink into more watered Aleene's glue until I got an algae-like shade and poured it into the crater. When the glue dried it gave the above result. Now, I could leave it like this. Algae was prevalent in Great War shell craters, feeding happily off the nitrogen component of the explosives literally fired into the soil. However, I wanted something that looks like recent shell craters, so I mixed another batch of glue with sepia and India ink.

This will dry like the first version, leaving a greenish-brown stain with a brighter green rim. It'll look like either a shell blasted a crater where an existing crater with a patch of algae had been, or a crater where algae is beginning to establish itself. The next stage will be to pour some Pledge polish with a light mix of green and sepia ink into the crater to look like brackish water separating out of the mud. Pictures of the final result to follow, once everything's dried.
Lewis
gunner Jack Dillon recalled years later how ‘the mud there [at
Passchendaele] wasn’t liquid, it wasn’t porridge, it was a curious kind
of sucking kind of mud ... a real monster that sucked at you’. - See
more at:
http://www.bl.uk/world-war-one/articles/sensuous-life-in-the-trenches#sthash.DKaUW5kn.dpuf
Monday, August 3, 2015
The Crater Mess Experiment - 1
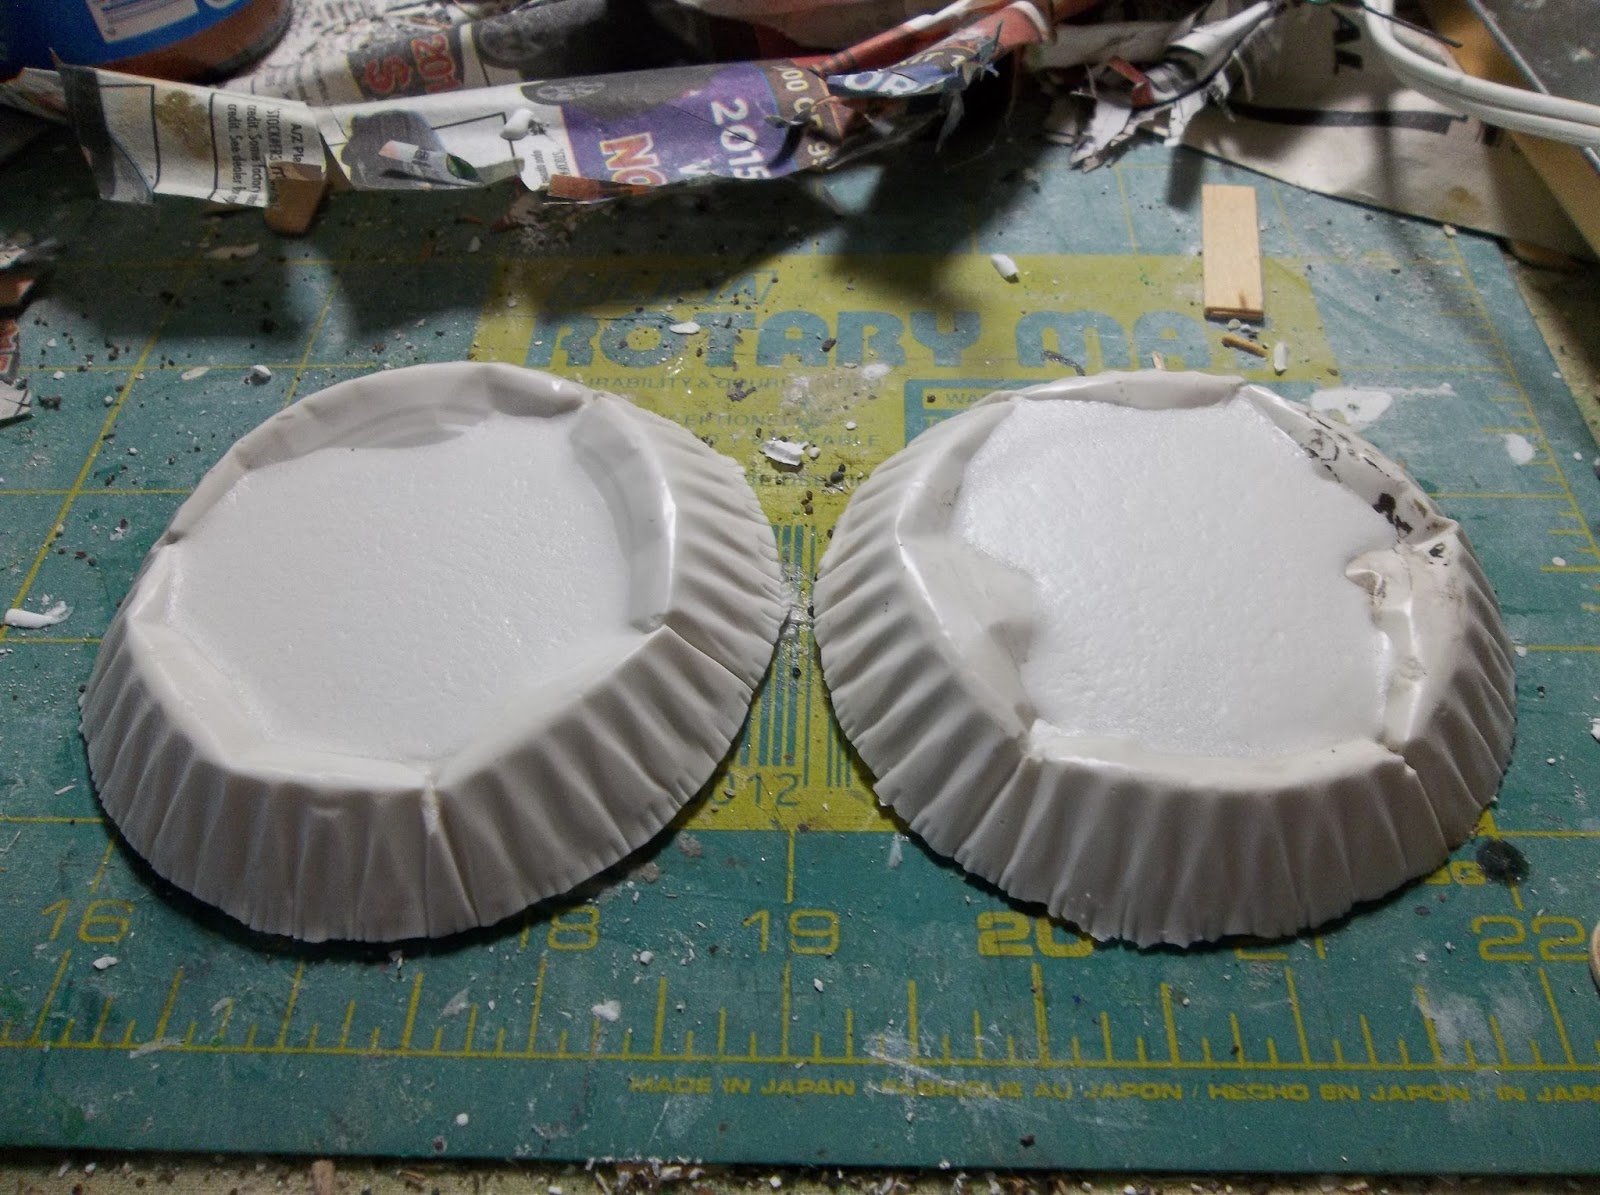
Some time ago I read of a method of making shell craters for gaming using tinfoil pie dishes filled with plaster. It looked a neat idea. Not having any immediate need for craters at the time I put a few pie dishes away against the day I'd get to try it out. That day has arrived.
To make these, push the bottom of the foil dish in to form a depression. Turn the right way up and fill with plaster. I use Hydrostone. Allow to it set then tip it out. The photo shows the basic result.
They look a bit too regular for shell craters, but I'll come to that later.

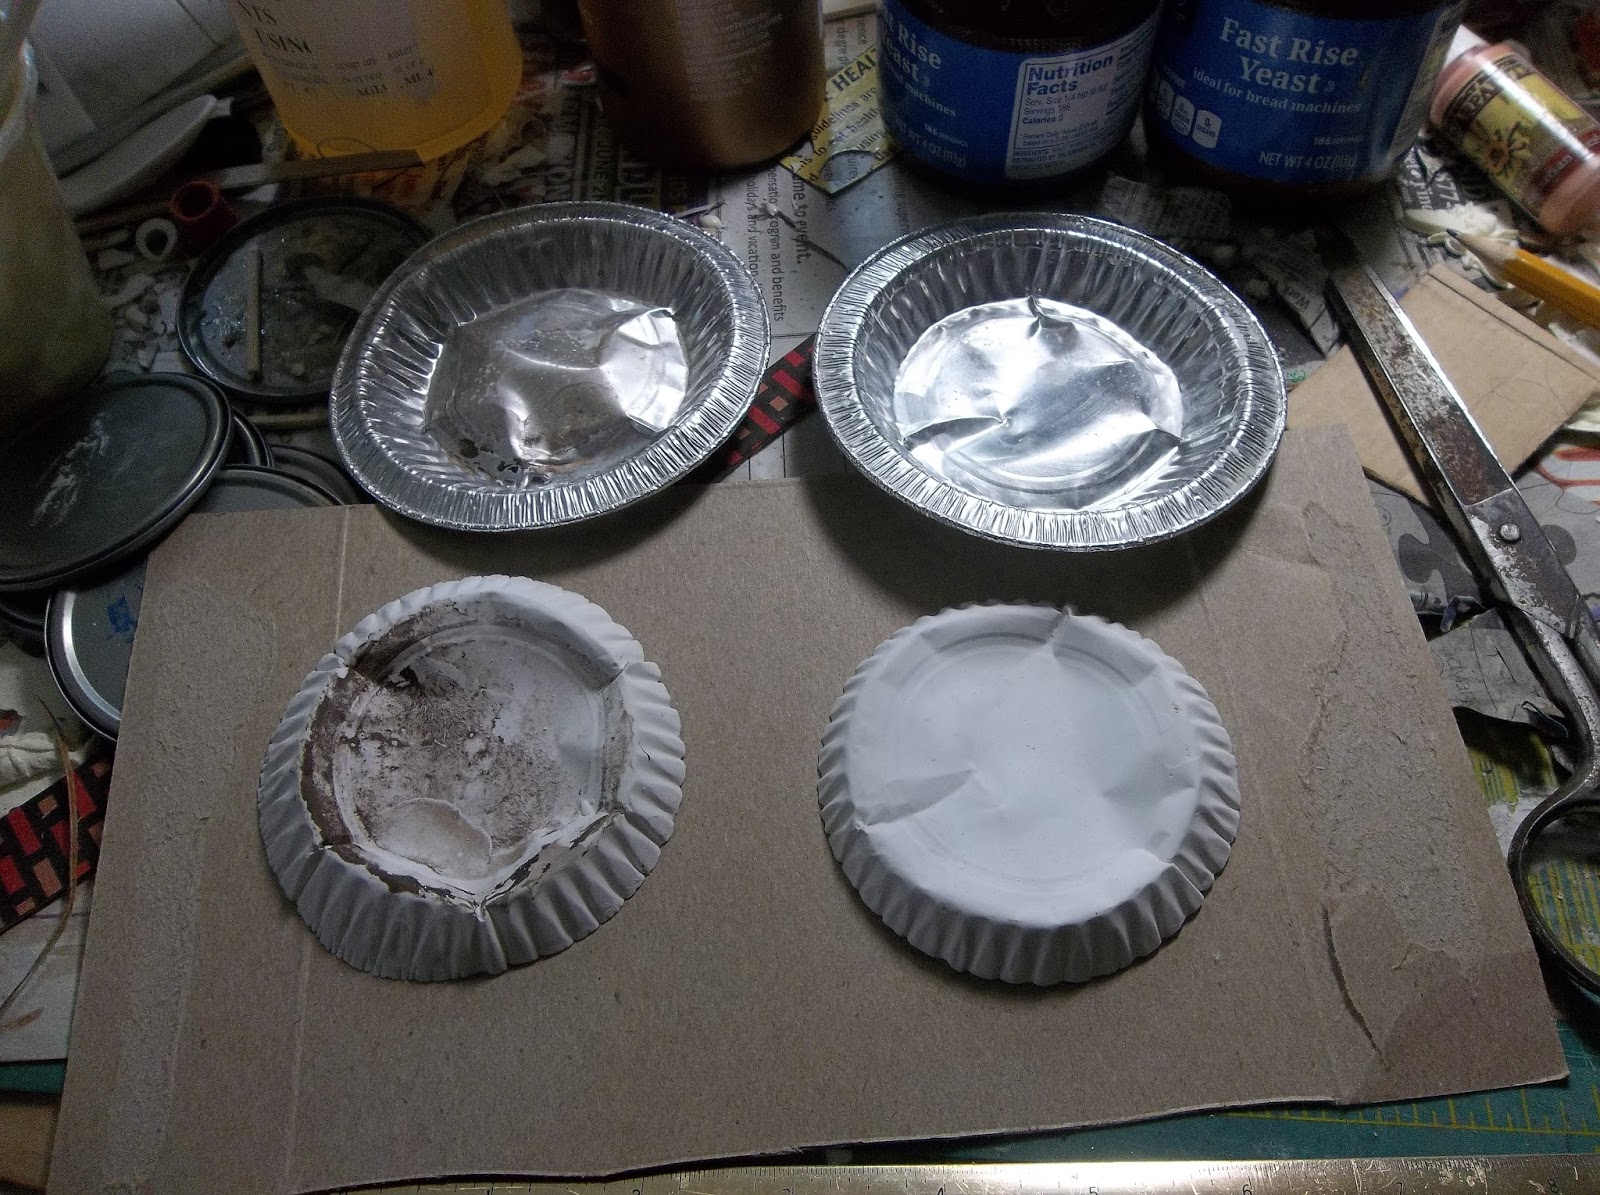
Next up, I glued circles of thick card on the bottom of the craters-to-be using Aleene's tacky glue. Note: the plaster must be thoroughly dry before doing this. Any moisture still in the plaster will cause the glue bond to fail.

With the plaster craters fixed to the card, I applied 'Liquid Nails' construction adhesive around the edges. This dries hard after a couple hours but with some flexibility, making it less likely to chip than spackle or similar. While the adhesive was fresh, I covered it with dried coffee grounds and pressed them into it for a firm bond. It looks like coarse soil or rubble.
Once all that is dry, the next stage will be to make the circumferences of the craters less regular using streaks of spackle covered with more coffee grounds and sand.
Sunday, August 2, 2015
Going to the wall
I'm contemplating the next game in my VBCW campaign set between the Anglican League based in Thetford, Norfolk, and the BUF out of Bury St. Edmunds in Suffolk. The League scored a major success in the last action, almost destroying the BUF platoon and helping to capture part of the Crown Jewels. The BUF were sent reeling back to their main line positions on the axis
West
Stow-Culford-Ingham-Ampton, with an outpost the East side of the
Mere at Great Livermere.
My original idea for the next game was a direct attack by the Anglican League down the A134 against BUF positions in the village of Ingham. Further thought led me instead to the eastern end of the lines.
The tiny Domesday village of Ampton lies approximately half a mile east of Ingham. Its main claim to fame is as the birthplace of Robert FitzRoy RN, captain of HMS Beagle during Darwin's voyage. The small, early 14th century church of SS. Peter & St. Paul stands to the south end of the village. Ampton Hall lies to the East in extensive walled grounds nestling up against the Mere. New Road runs north to south straight through the village. Approximately a mile south of Ampton at the hamlet of Timworth Green the road turns to the west and joins the A134.
Anglican League intelligence reports the village is garrisoned by the battered remnants of the platoon which opposed them at Honnington aerodrome and later in the Battle of Three Farms. HQ believes if enough pressure is brought to bear this platoon will fold. Piercing the BUF lines at Ampton will enable League forces to use New Road to outflank the BUF lines and directly threaten their communications with Bury St. Edmunds.
III BUF Platoon got battered right enough, and lost its inept leader. It has been reinforced but is not in good heart. The terrain in and around Ampton favour defence though, and might be enough to help them hold a further attack.
Which leads me to my recent terrain building session...


One feature of Ampton I gleaned from the Google map street-view is the presence of a number of high walls lining New Road. These would obviously be a major feature of the defence. Not having any suitable walls to hand, I made some. A quick search for brick walls brought up a number of useful images. Doing a bit of cutting-and-pasting using Paint enabled me to print off several sheets of brick paper, which I then folded and cut and pasted for real on corrugated card. The bases are cut from wooden tongue depressors, and the 'grass' is green sand fixed with diluted PVA. This also helps weigh down the wall strips, which otherwise would be too light.
Subscribe to:
Posts (Atom)
